¶ Connect Workflows
¶ Pre-requisites for installation (SQL, SQLExpress, default instance, mixed login)
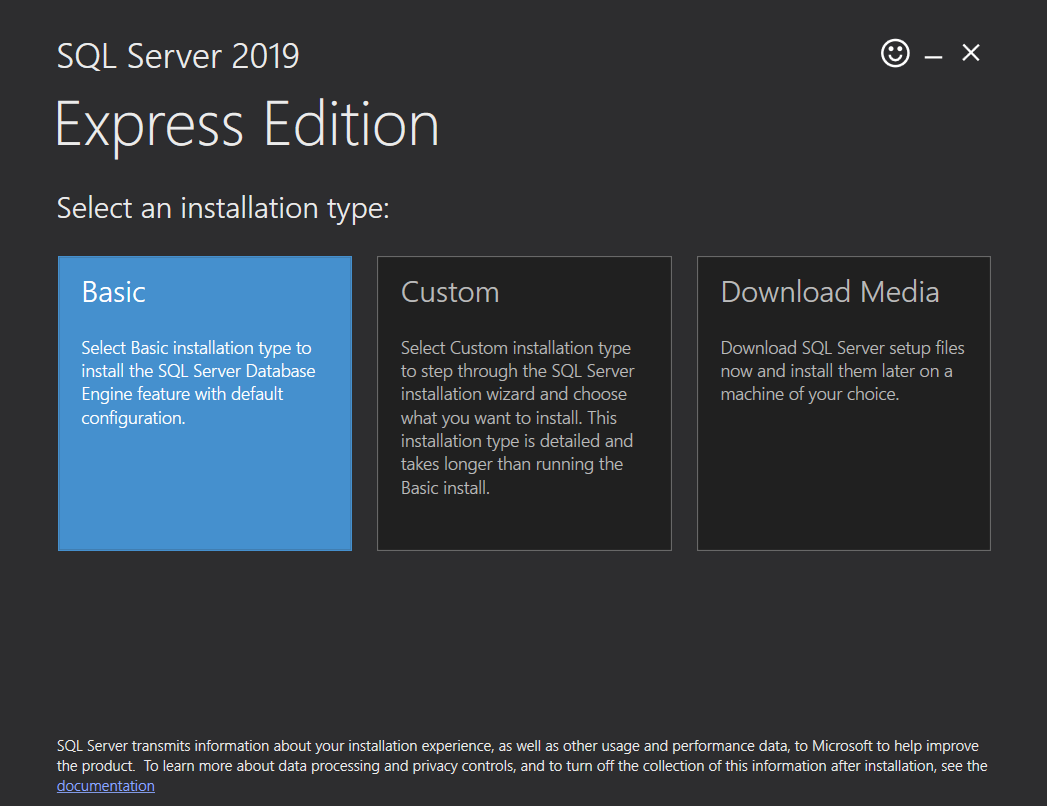
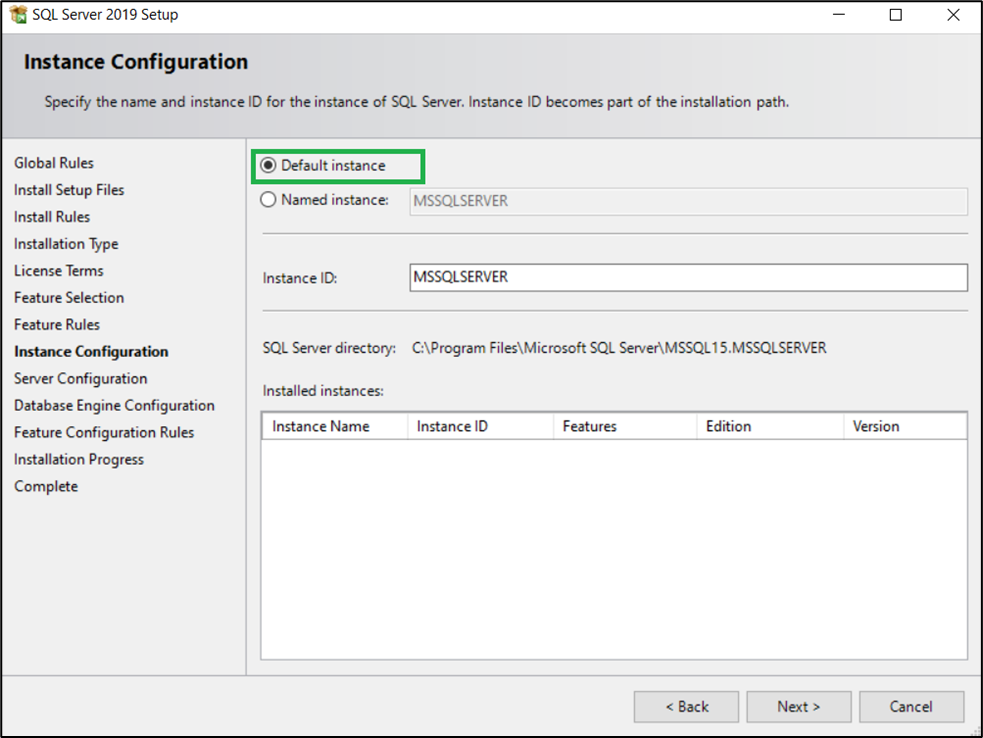
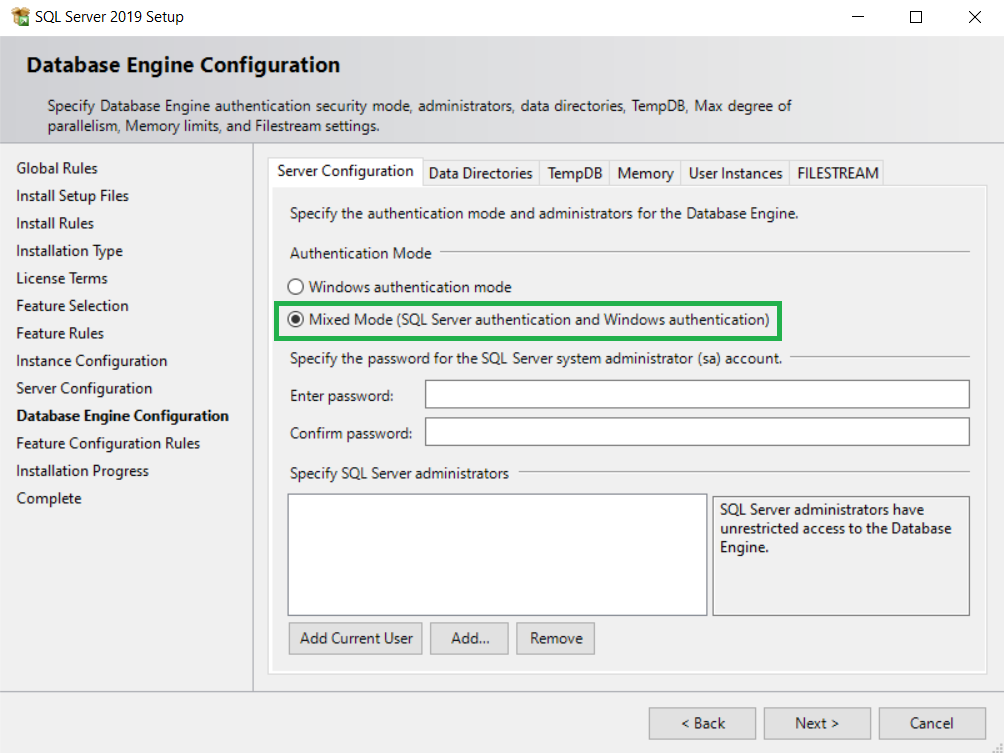
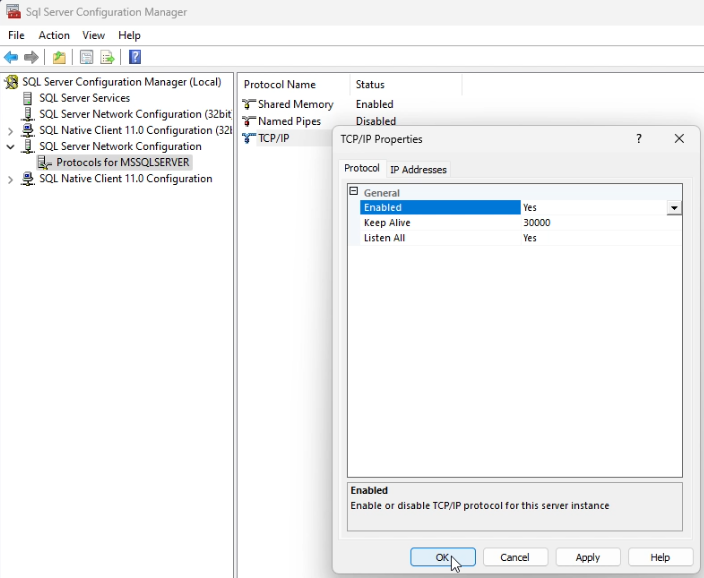
Default instance of SQL Server or SQL Server Express with mixed mode login (set during installation as shown in fig. 1, 2, 3 and 4 ) is required for using workflows in Connect. You can get newest version of SQL Express from Microsoft.

Downloading and installing new version of Connect from the Order Manager portal, Connect menu in the Download subsection will automatically setup your SQL default instance to work with workflows in Connect. For more details regarding Connect installation please refer to Connect 5 Quick Start Guide.
Only for Windows 11
Open “SQL Server 2019 Configuration Manager” as administrator. Go to “SQL Server Network Configuration” > “Protocols for MSSQLSERVER”
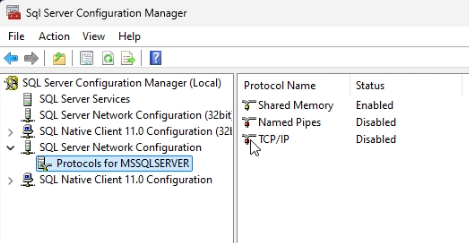
Enable “TCP/IP”
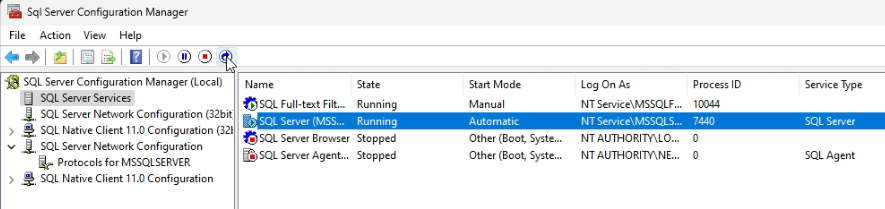
Go to “SQL Server Services” and restart “SQL Server (MSSQLSERVER)” clicking on restart button
¶ How to manage workflows (add, delete, download, upload, shared, private)
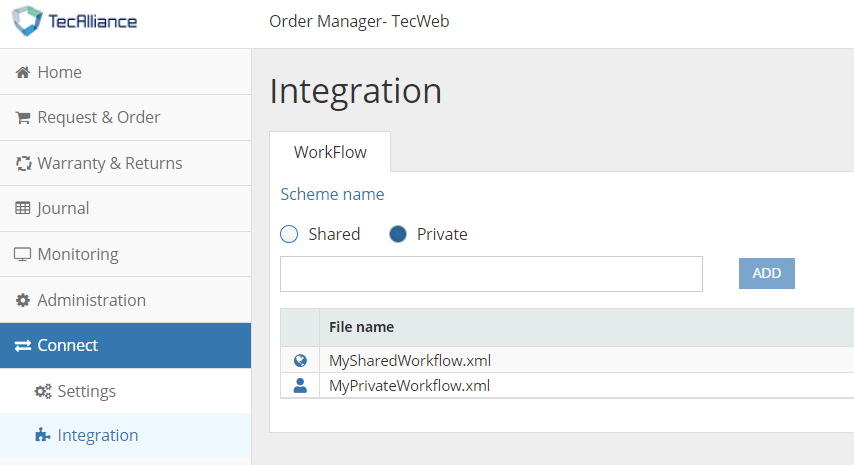
To begin working with workflows, you need to login into Order Manager portal, open Connect menu and go to the Integration section. Once there, select WorkFlow subsection. From here you can add new workflows, edit existing ones by clicking on their names or delete them by clicking the associated icon.
¶ Adding new workflows
When creating new workflows, it is possible to choose between two options – Shared or Private. Private workflows are available for one Organization while shared ones are accessible for the entire Connect installation. Private workflow will have precedence over Shared one in the case of having Private and Shared workflow with the same name.
In order to add a new workflow, you need to give it a valid name, select whether it should be shared or private, then click the add button. After that, the workflow designer will open for newly created workflow. From there you can edit the workflow, upload a file containing a workflow or download currently edited workflow as a file.
Important: remember to save your work with a workflow by clicking the “Save Workflow” button.
¶ Deleting workflow
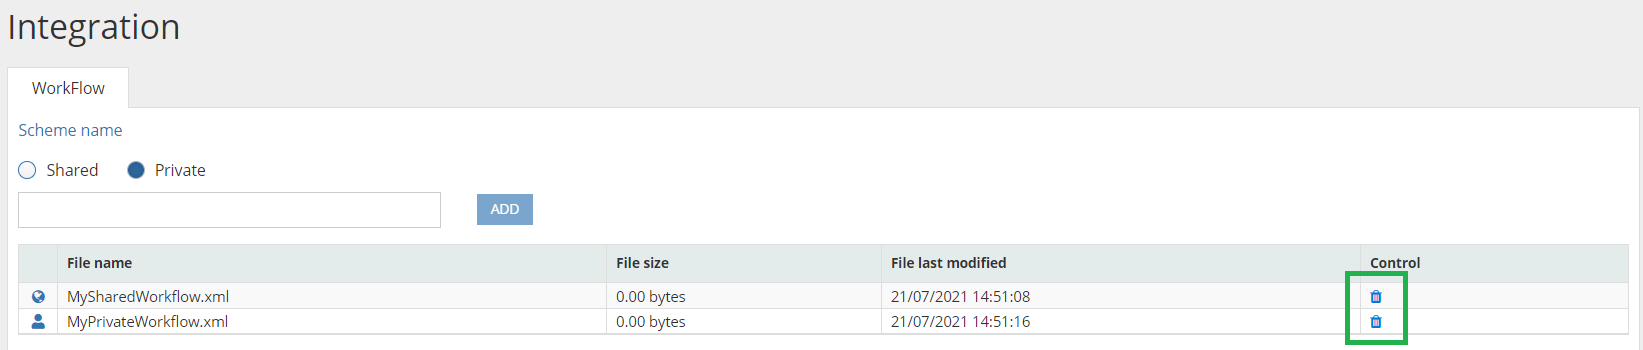
Under Connect menu in your Order Manager portal, in the WorkFlow subsection of the Integration section, you have the possibility to delete workflows that are no longer in use by clicking on the trash bin icon next to the name of the workflow you want to delete. You cannot remove the workflow that is active in the processing in your Connect Settings. Consider downloading your workflow as backup before deleting it.
¶ Uploading workflow
While editing a workflow, you are given the option to “Upload Workflow” via associated button. Using this option will import workflow design from a file to the workflow being currently edited. Whether you add changes to imported workflow or not, remember to save your work by clicking “Save Workflow”.
¶ How to design workflows
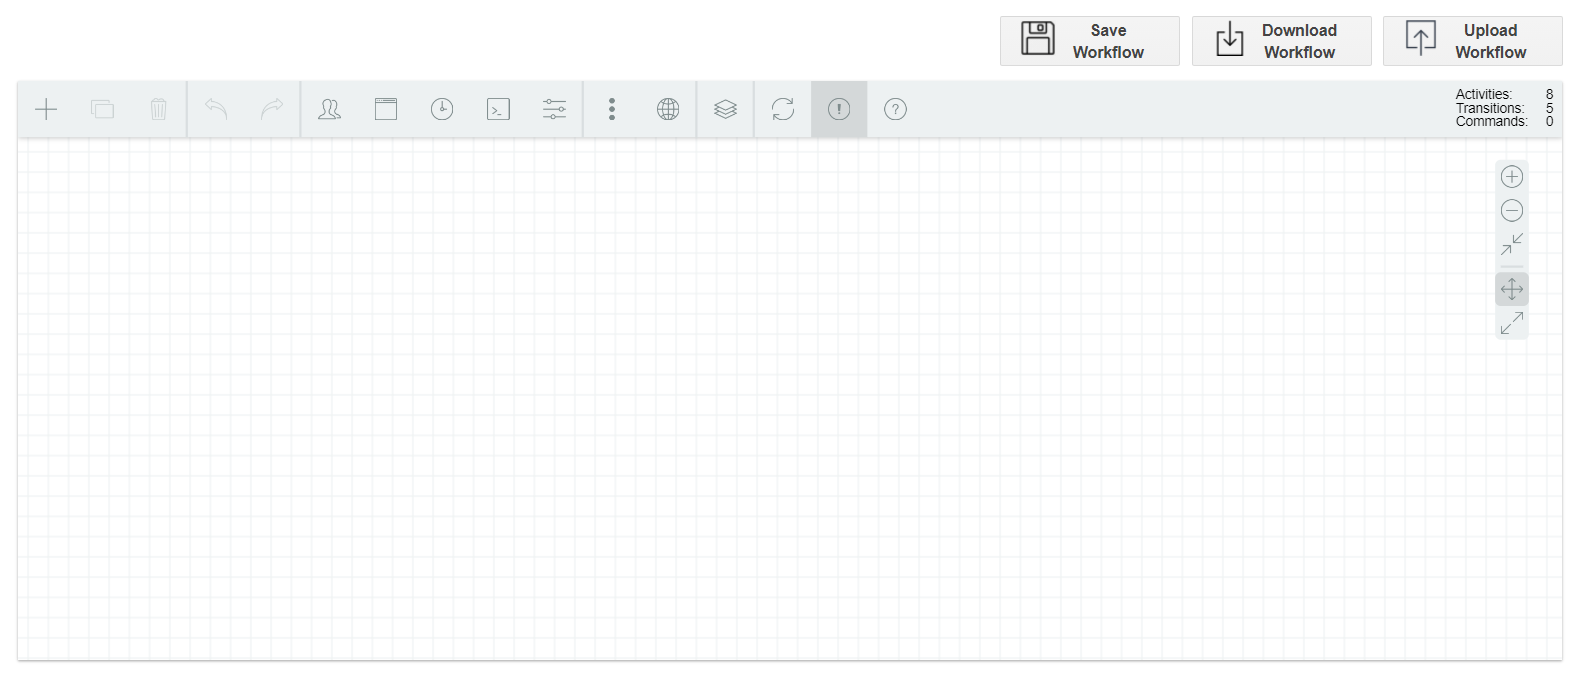
You can edit workflows in workflow designer (Figure 7), where you are presented with possibility to add and connect different activities for processing your messages. Plan ahead considering which scenarios you want to use the workflow in and design it accordingly.
¶ Adding activities
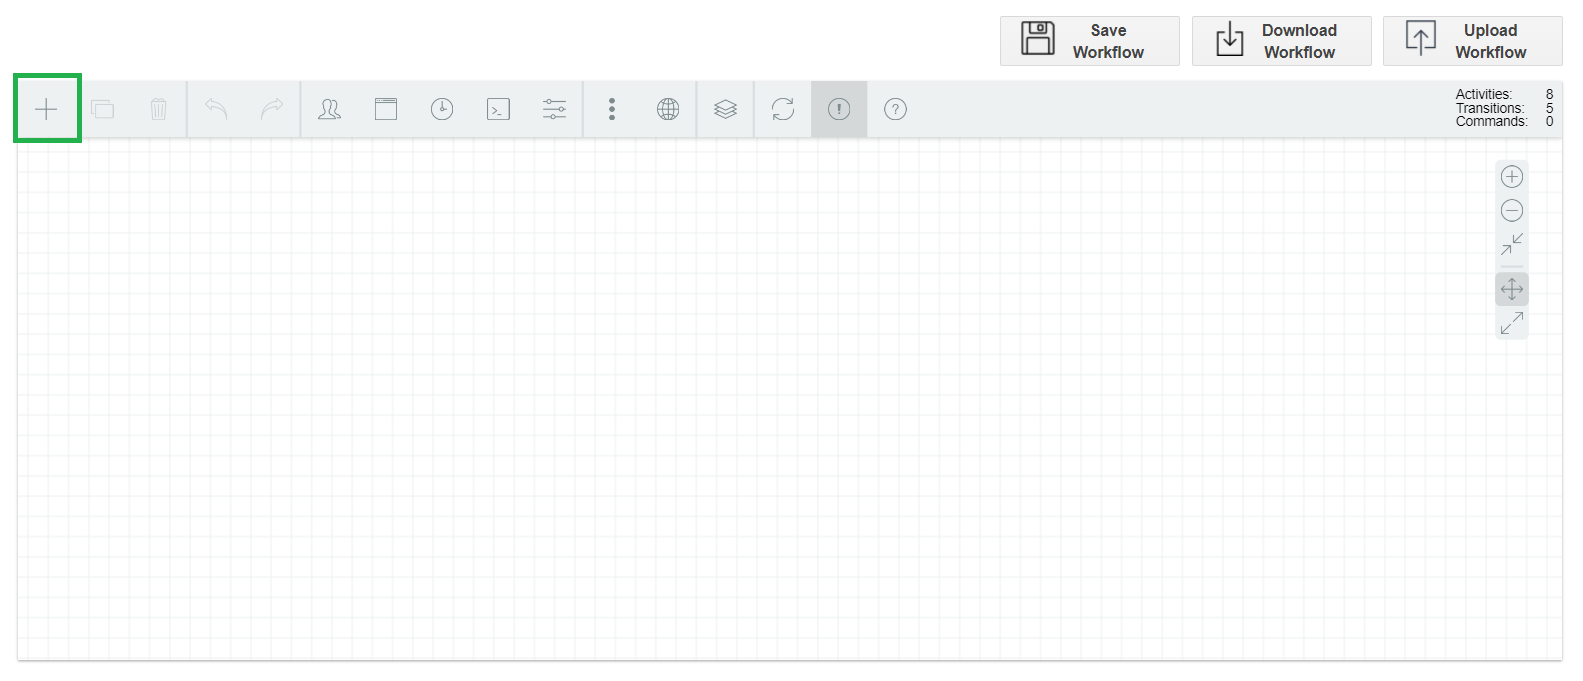
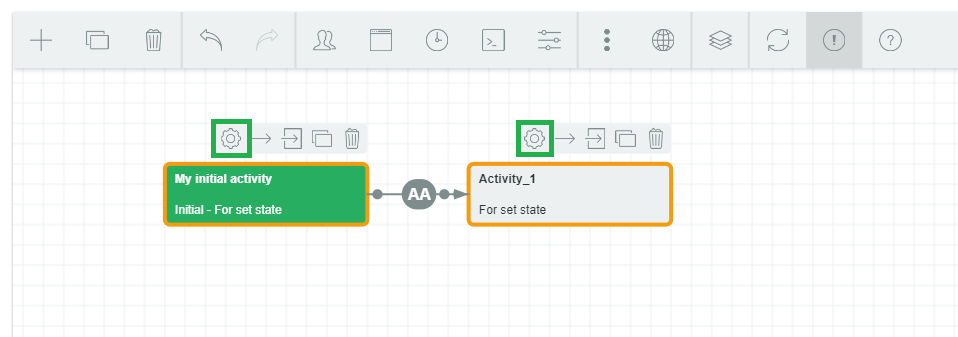
You can add activities to the workflow by clicking “Create activity” button from the designer toolbox. This will create a new activity in your workflow that you can further edit by selecting the activity and clicking the gear (edit) icon or double-clicking on it.
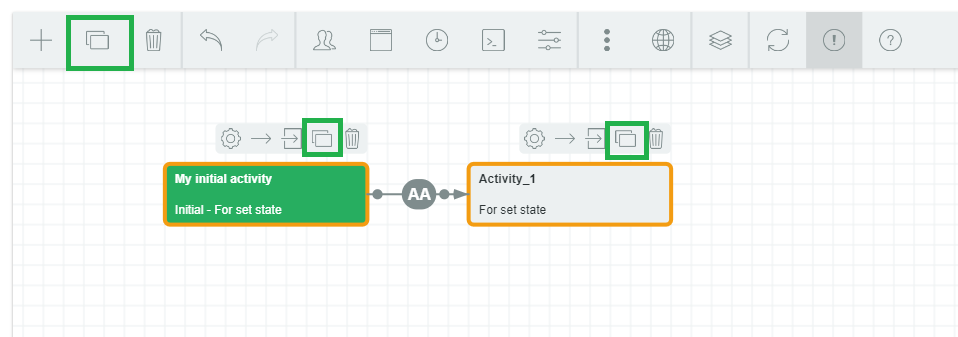
You can also copy selected items in the designer by selecting them (you can select multiple items by ctrl + clicking them) then using the “Copy selected” button from the toolbox. To copy individual activities, select them and click on the two rectangles (copy) button.
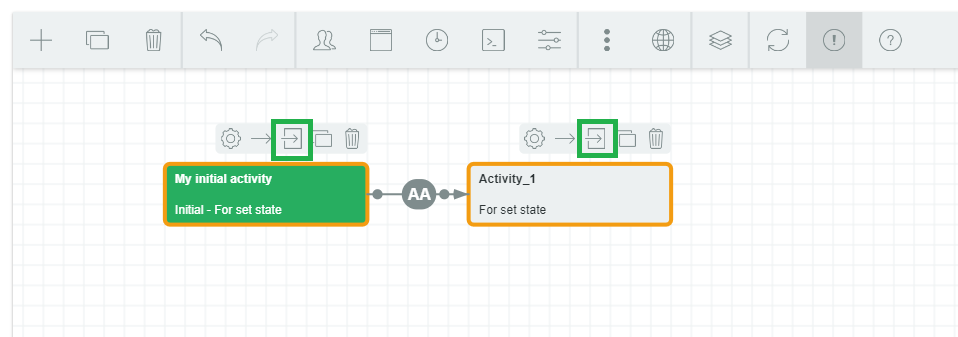
Finally, you can create new activity from already existing one with a transition by selecting an originating activity and clicking the arrow and rectangle icon.
¶ Editing activities
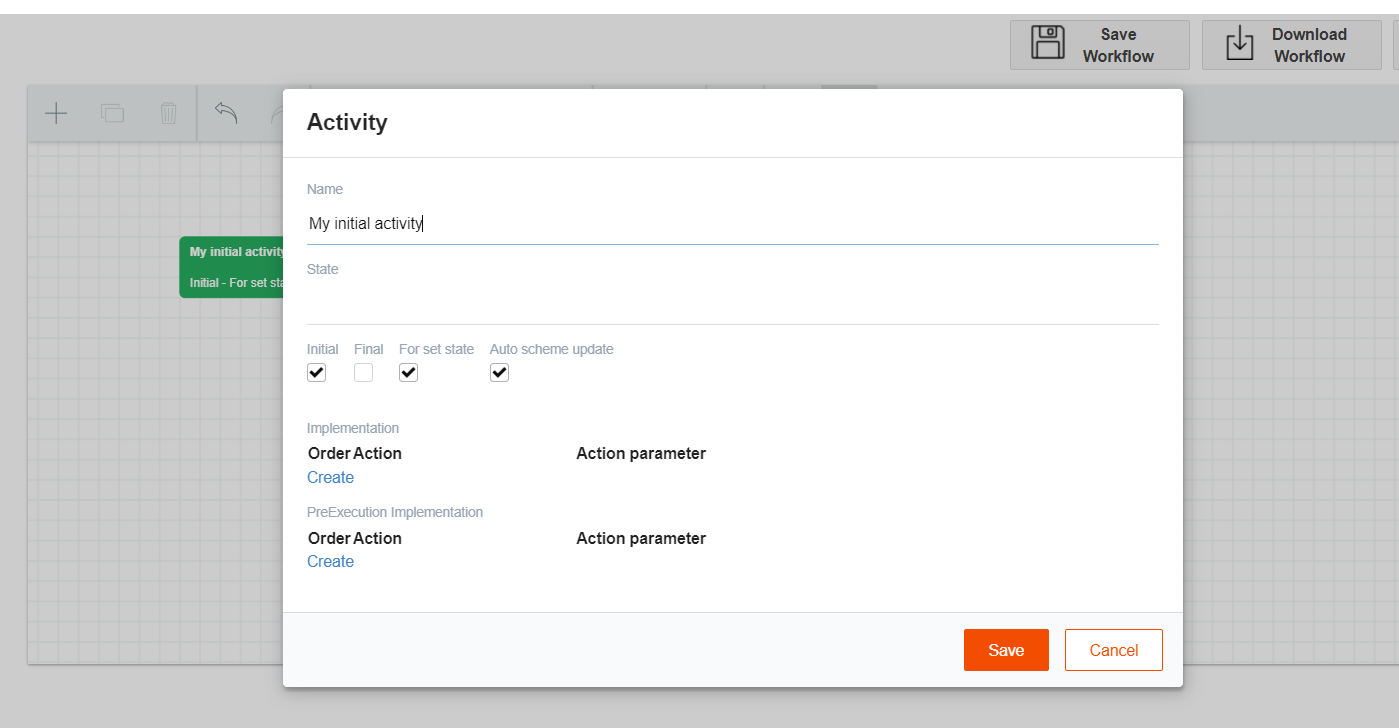
To edit an activity, select it and click the gear (edit) icon or double-click it. In the pop-up window called Activity you can edit properties of the activity and assign actions to it. Actions apply specific processing to the message, like transformation, forwarding to platform, sending email, storing a file and more.
¶ Deleting activities
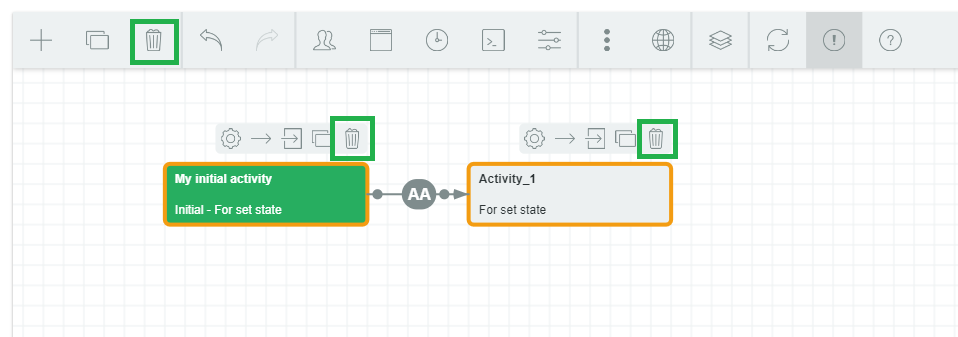
To delete an activity, select it and click the trash bin icon. Deleting an activity will also remove associated transitions.
¶ Transitions
Activities in your workflow are connected by transitions. Transitions allow for logical processing from one activity to another and give you the possibility to edit the conditions for the processing. Connect5 supports three conditional transitions based on message type further described in editing transitions.
¶ Adding transitions
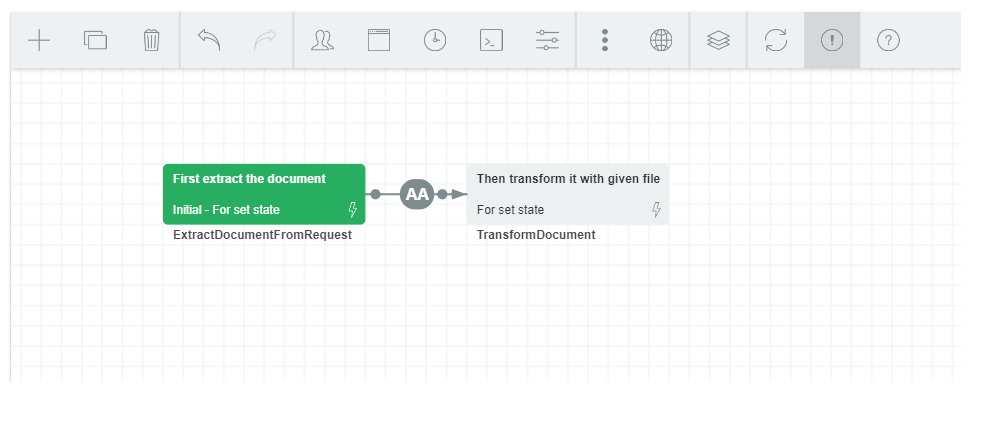
To add a transition, select the originating activity then click on the arrow button. Next, select activity the transition will lead to and click it. This will form a transition between the two activities, that you can further edit.

Transitions are also automatically created when creating new activities from already existing ones with transition between them.
¶ Editing transitions
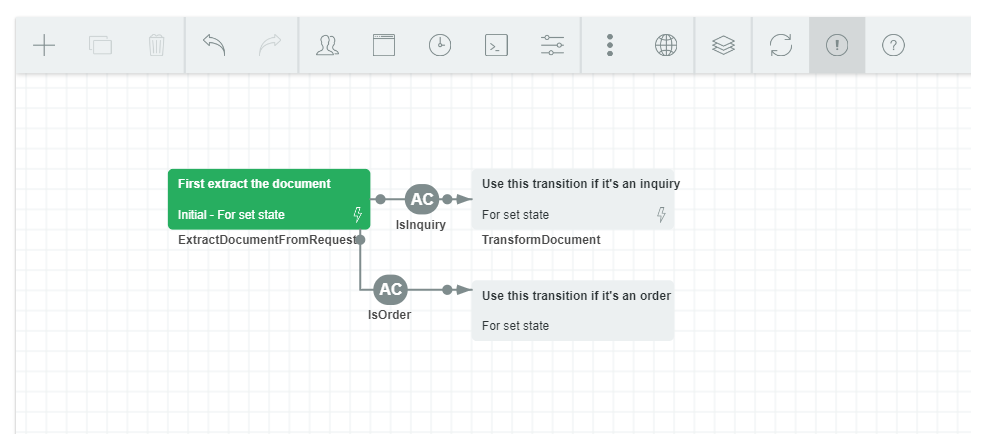
To edit a transition, select it and click the gear (edit) icon or double-click it. In the pop-up window called Transition you can edit properties of the transition and assign action to it. There are three actions that allow you to filter three message types: IsInquiry, IsOrder and IsStockOrder.
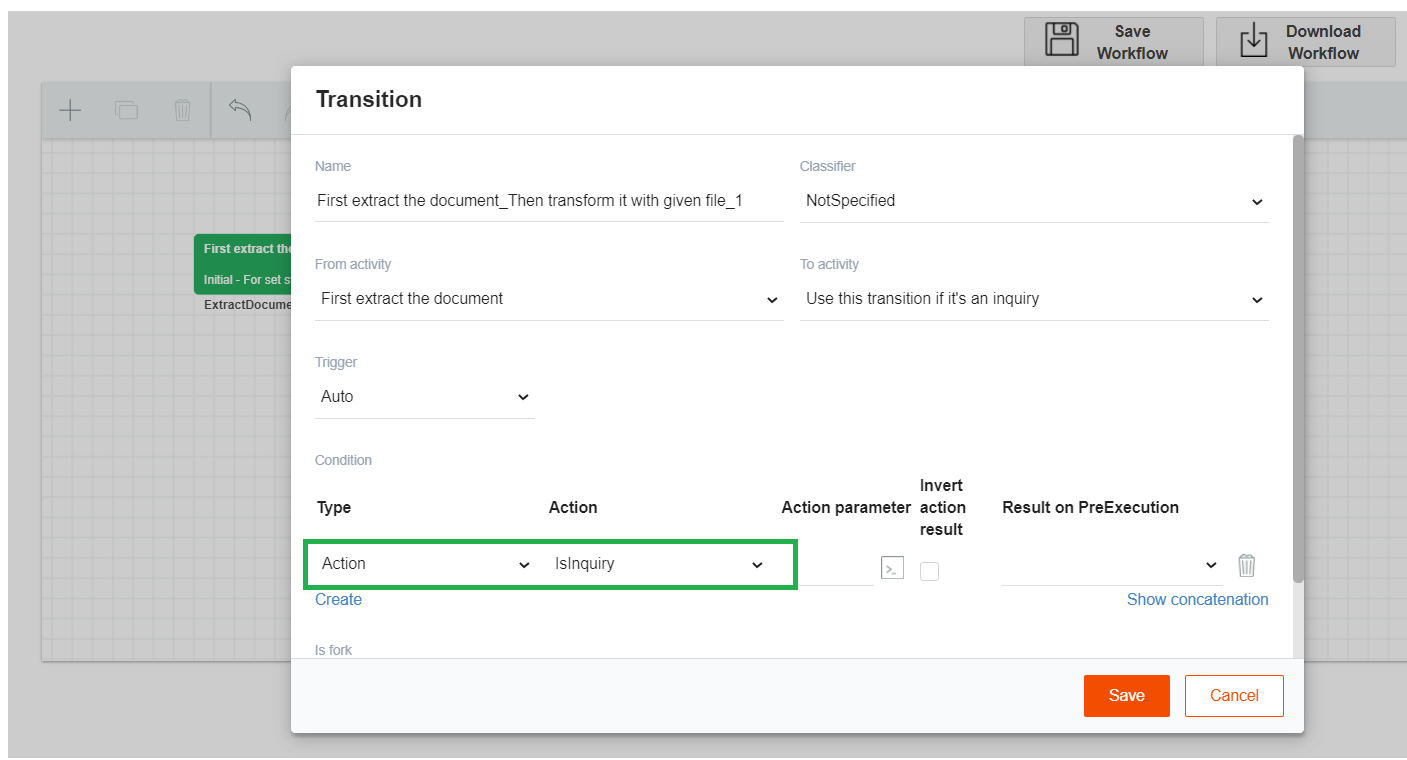
As a result you can create different flows for your processing. In this example a different transformation can be used for Inquiry or for Order.
¶ Deleting transitions
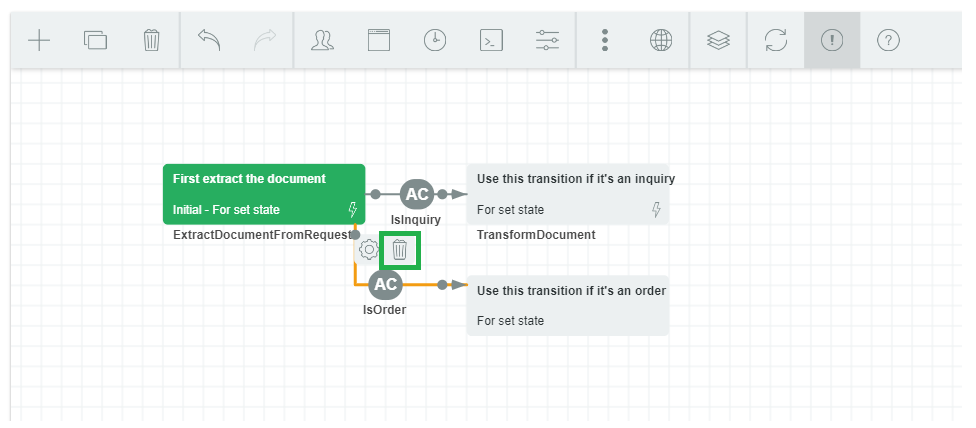
To delete a transition, select it and click the trash bin icon. Deleting a transition will not remove associated activities.
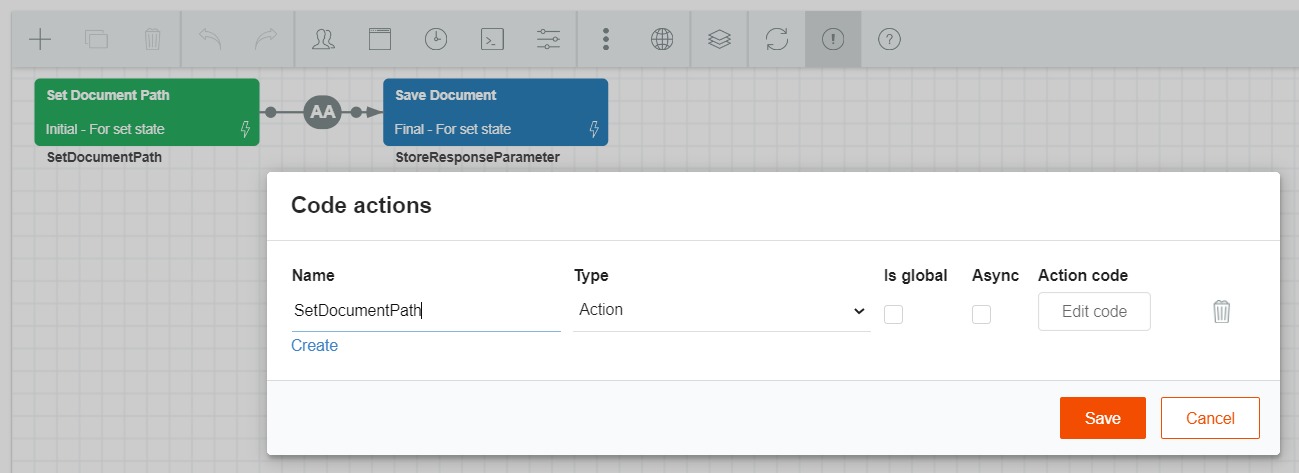
¶ Code Actions
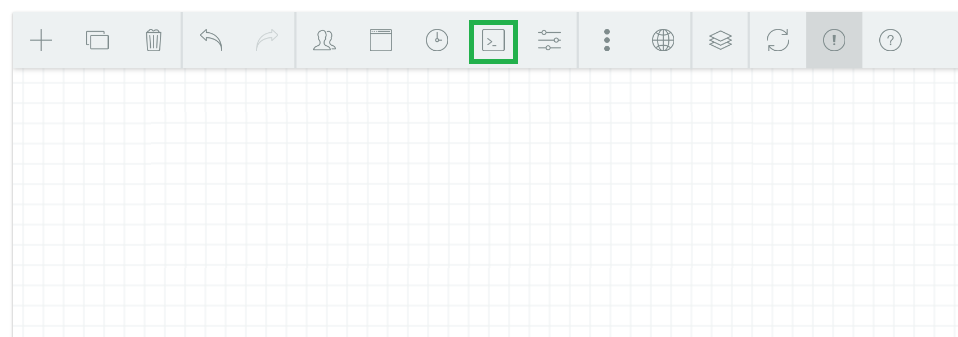
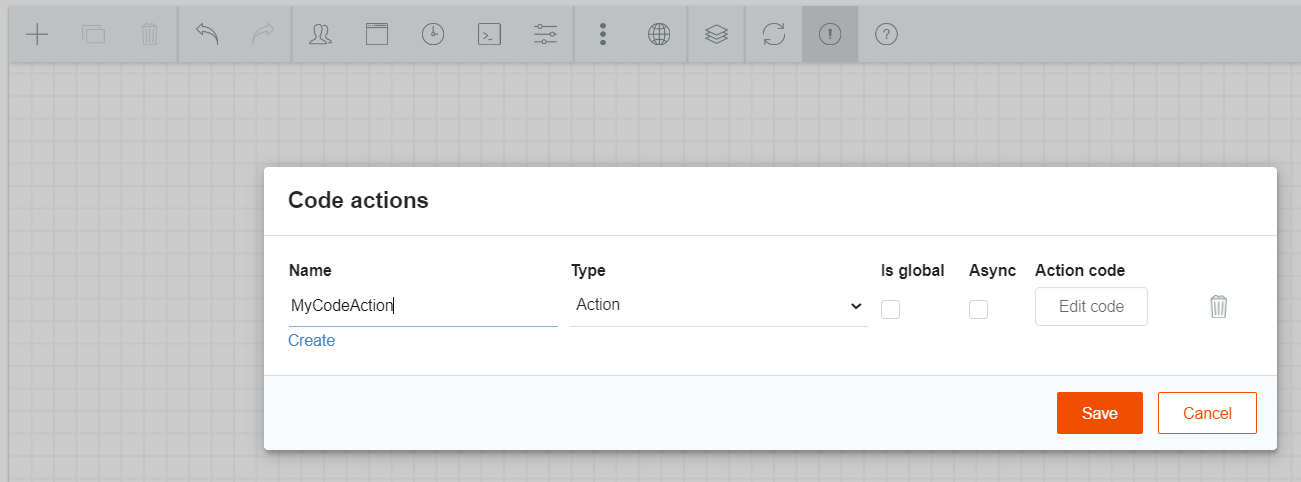
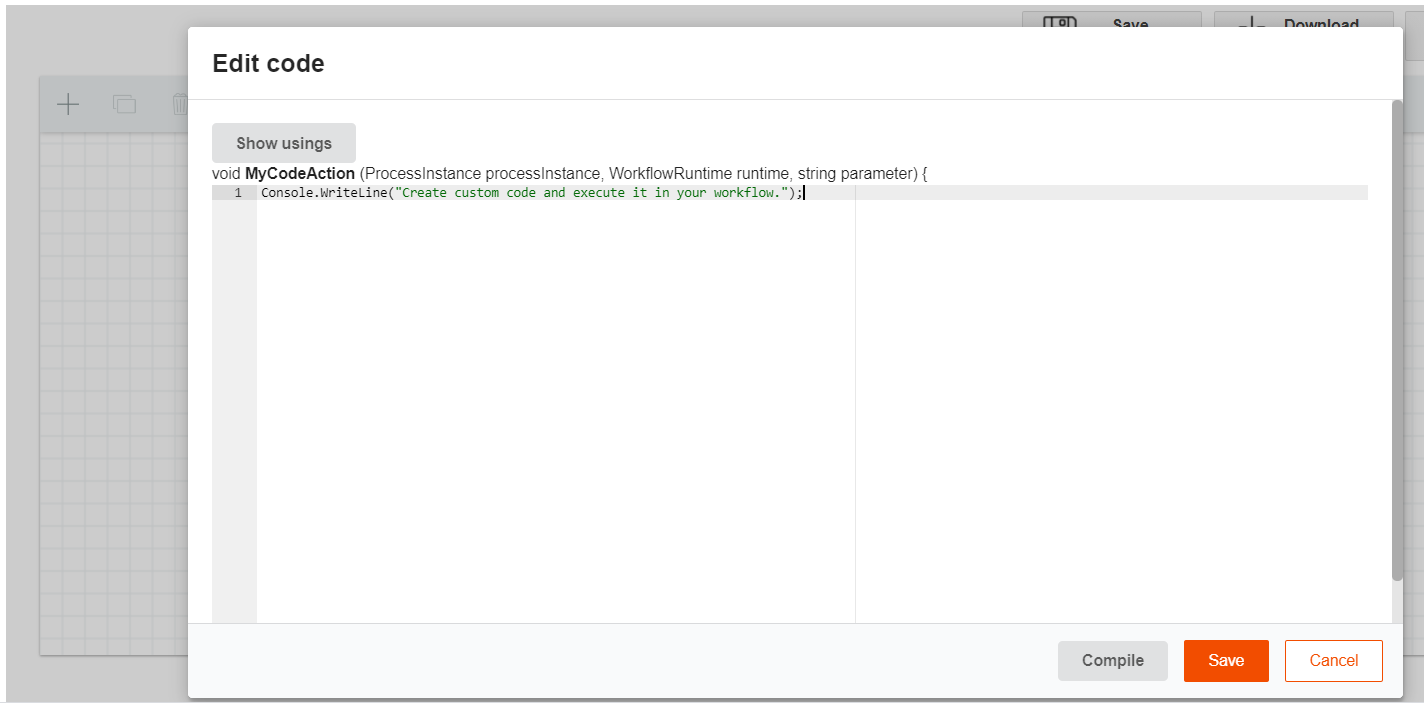
Custom code actions can be implemented and added to workflows through the Code actions button.
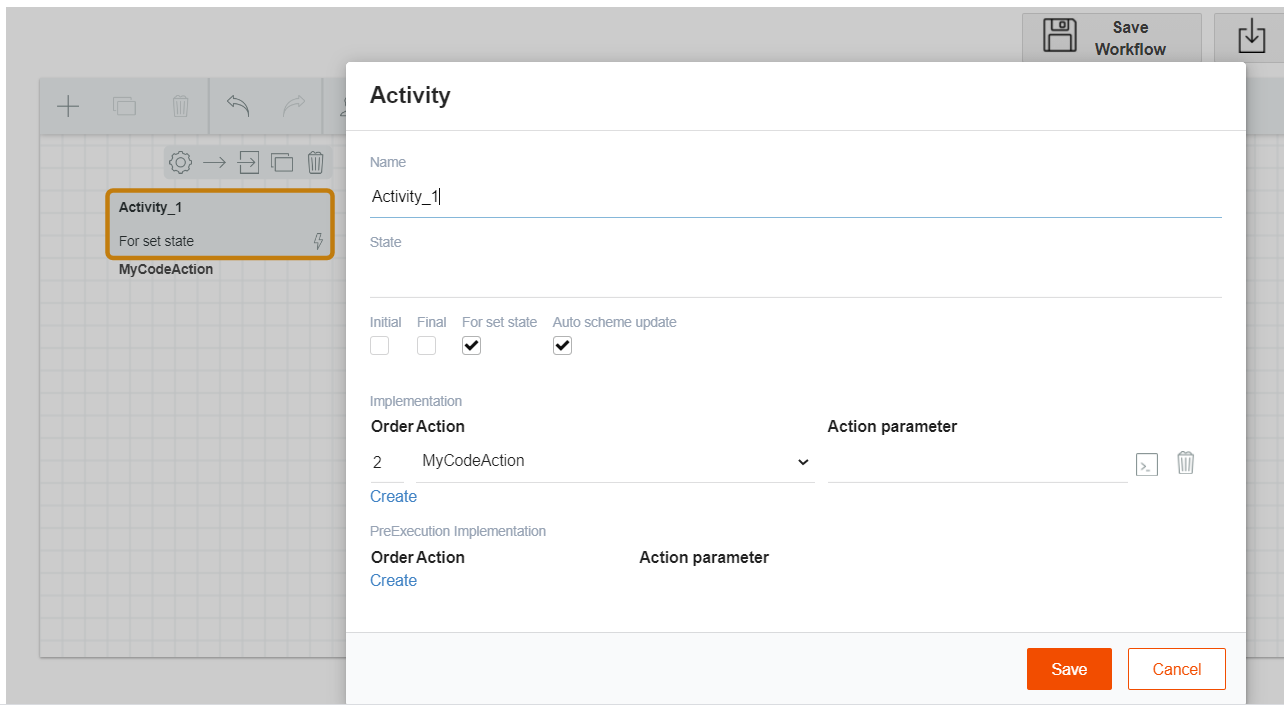
After creating your code action, you can use it in an activity of your choice by selecting it from the drop-down list.
¶ Extended info
Second to last on the toolbar is the Extended info button – toggling it will allow you to see extended information showing the selected actions in your activities.
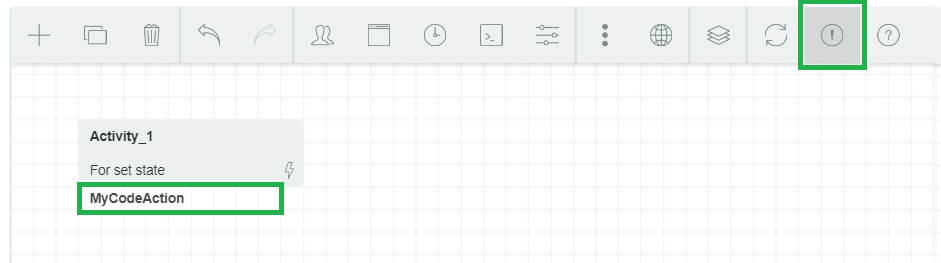
Example of workflow use for pull client when processing documents with custom action:

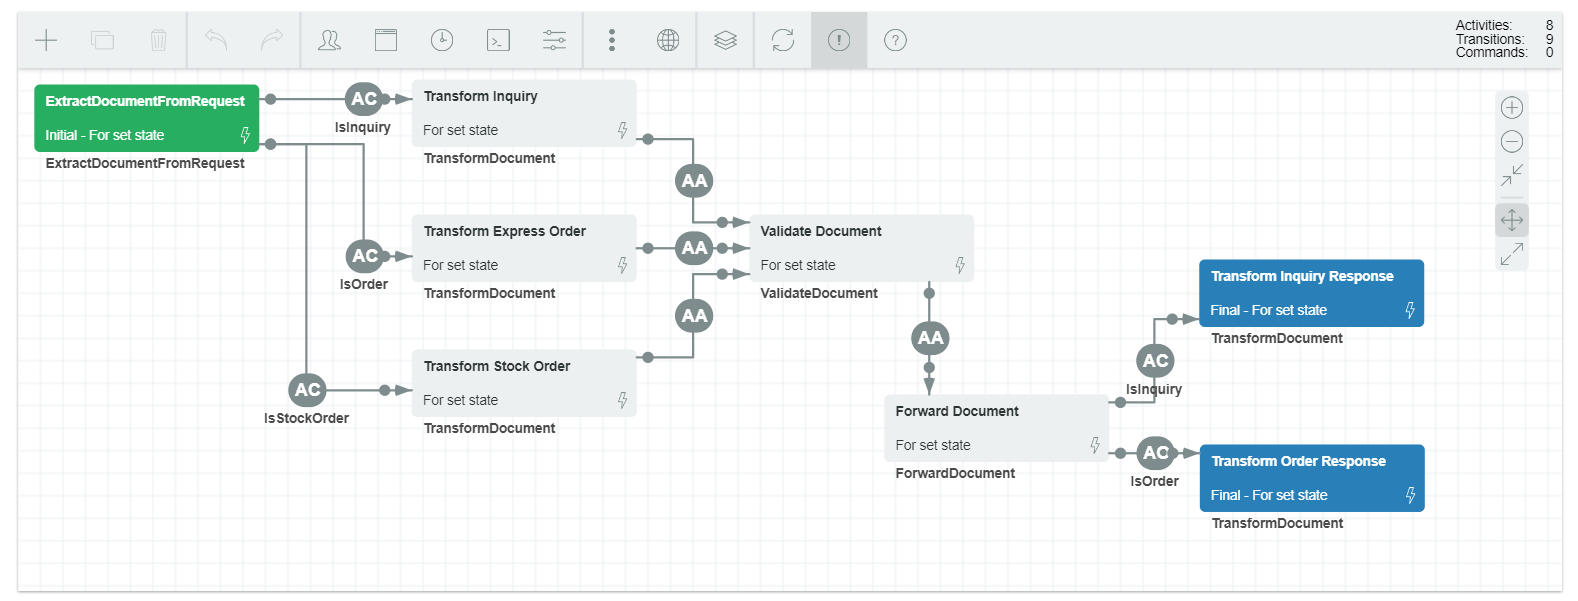
Example of web service workflow with custom transformations depending on message type:
¶ When designing workflow keep in mind to:
- Create initial activity (with the Initial checkbox ticked in the edit activity pop-up) that would be the starting point for processing your messages in the workflow
- Mark the last activity in each of your processing flows as final (with the Final checkbox ticked in the edit activity pop-up)
- Connect your activities using transitions and consider “Otherwise” flow when using conditions to account for all possible scenarios
- Properly set parameters for your activities and transitions (see x.y for activities and x.z for transitions)
¶ Available workflow actions:
¶ ChangeEncoding
Use this action to read the document with specified encoding. In the case where encoding is not specified as a parameter for this method, default encoding UTF8 will be used in this action.
Action parameters: {"encoding": string}
Example: {"encoding": "iso-8859-1"}
¶ ExecutePlugin
Use this action as a supplier, to run (currently configured in integration section) plugin as a part of your workflow.
¶ ExecutePrefile
Use this action as a supplier, to run (currently configured in integration section) prefile as a part of your workflow.
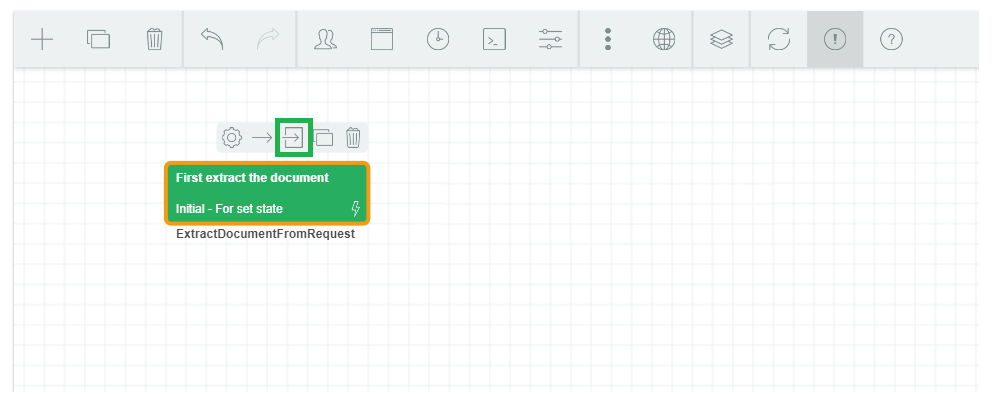
¶ ExtractDocumentFromRequest
Use this action to read function call request before processing it later in your workflow (as shown in Figure 27).
¶ ForwardDocument
Use this action to forward document to platform and save response into process instance variable which you can further use in your workflow (as shown in Figure 27).
Action parameters: {"DefautResponseOnPlatformError": boolean}
Example: {"DefautResponseOnPlatformError": true}
¶ LookupBuyerParty
Use this action to retrieve missing BuyerParty and DeliveryParty information in your DTS workflow
¶ SendEmailOrder
Use this action to send processed message with mail settings configured as action parameter
Action parameters: {"smtp": string, "port": int, "username": string, "password": string, "subject": string, "to": List<string>, "from": string, "fromname": string}
Example: {"smtp": "smtp.domain.com", "port": 465, "username": "user@domain.com", "password": "ucJq3CaVexzpk", "subject": "Message", "to": ["receiver1@domain1.com"], "from": "user@domain.com", "fromname": "User"}
¶ StoreResponseParameter
Use this action to save processed message (PROC_FUNC_CALLCONTENT process instance variable) to a file
Action parameters: {"unique_name":bool, "extension": string, "path": string, "encoding": string}
Example: {"unique_name":true, "extension": ".xml", "path": "Responses", "encoding": "UTF8"}
¶ TransformDocument
Use this action to transform a document using XSLT, IFD or plugin.
Action parameters: {"filename": string}
Examples: {"filename": "pretty.xslt"}
{"filename": "format.ifd"}
{"filename": "plugin.zip"}
¶ ValidateDocument
Use this action to validate document
¶ How and when workflows can be used (integration, DTS send, DTS receive, WCF)
After successfully creating and editing your workflow, you can use it for processing your Connect messages by selecting appropriate workflow in Order Manager portal, Connect menu Settings section (as a Supplier you can also use workflow in the Integration Type subsection in the Integration section to process incoming messages).
¶ Using workflows in the DTS
Workflows can be used for processing messages in both send and receive directories of your DTS. You can assign a workflow to a directory while adding new directory by selecting it from “Processing” drop-down list. You can also edit existing send and receive directories by clicking the pen (Edit) button and selecting appropriate workflow from “Processing” drop-down list. Remember to save your settings by clicking the “Save” button.
¶ Using workflows in the ERP
Workflow can be used for processing messages in your Connect installation configured with Web Service in the ERP subsection. Select appropriate workflow in the Processing” drop-down list. Remember to save your settings by clicking the “Save” button.
| Action Name | Description | Designer action parameters | Input parameters set by Connect5 | Output Parameters set by workflow actions | |
| ChangeEncoding | Read document with specific encoding | {"encoding": string} | DOCUMENT_PROCESS_FULL_PATH (R) | PROC_FUNC_CALLCONTENT | |
| ExecutePlugin | Process message with plugin | PROC_FUNC_CALLREQUEST ?* FUNC_CALLREQUEST (R) | FUNC_CALLRESPONSE | ||
| TEC_ID (R) | PROC_FUNC_CALLCONTENT | ||||
| RESPONSE_VALIDATION (R) | |||||
| ExecutePrefile | Process message with prefile | PROC_FUNC_CALLREQUEST ?* FUNC_CALLREQUEST (R) | FUNC_CALLRESPONSE | ||
| RESPONSE_VALIDATION (R) | PROC_FUNC_CALLCONTENT | ||||
| ExtractDocumentFromRequest | Read FCR and set output values for processing with other actions | PROC_FUNC_CALLREQUEST ?* FUNC_CALLREQUEST (R) | FUNC_CALLID | ||
| PROC_FUNC_CALLTYPE | |||||
| PROC_FUNC_CALLCONTENT | |||||
| ForwardInvoice | Forward invoice document to solution portal | PROC_FUNC_CALLCONTENT (R) | |||
| DOCUMENT_ORIGINAL_FULL_PATH (R) | |||||
| DOCUMENT_PROCESS_FULL_PATH (R) | |||||
| ForwardDocument | Forward document to platform and save response into process instance variable | {"DefautResponseOnPlatformError": boolean} | DTS_DOCUMENT (R for DTS) | PROC_FUNC_CALLCONTENT | |
| DOCUMENT_ORIGINAL_FULL_PATH (R for DTS and Invoice) | PROC_FUNC_CALL_TRANS_ID | ||||
| If either of this parameters is present, mode is WCF: | In WCF mode set also: | ||||
| PROC_FUNC_CALLREQUEST ?* FUNC_CALLREQUEST (R) | FUNC_CALLRESPONSE | ||||
| LookupBuyerParty | Retrieve missing BuyerParty and DeliveryParty information | PROC_FUNC_CALLCONTENT (R) | PROC_FUNC_CALLCONTENT | ||
| DTS_DIR (R) | |||||
| SendEmailOrder | Send processed message with given mail settings | {"smtp": string, "port": int, "username": string, "password": string, "subject": string, "to": string, "from": string, "fromname": string} | PROC_FUNC_CALLCONTENT (R) | ||
| SUBJECT_DEFAULT | |||||
| SaveDocument | Save PROC_FUNC_CALLCONTENT process instance variable into file | {"unique_name":bool, "extension": string, "path": string, "encoding": string} | DOCUMENT_ORIGINAL_FULL_PATH | ||
| PROC_FUNC_CALL_TRANS_ID (R for WCF and Integration) | |||||
| PROC_FUNC_CALLCONTENT (R) | |||||
| TransformDocument | Transform a document using XSLT, IFD or plugin, depends on the extension of the file. Determine the mode based on parameters and set value accordingly | {"filename": string} | PROC_FUNC_CALLCONTENT (R for DTS and Invoice) | PROC_FUNC_CALLCONTENT | |
| TEC_ID | |||||
| FUNC_CALLREQUEST | PROC_FUNC_CALLREQUEST | ||||
| FUNC_CALLRESPONSE | PROC_FUNC_CALLRESPONSE | ||||
| PROC_FUNC_CALLREQUEST (R for Integration and WCF) | |||||
| PROC_FUNC_CALLRESPONSE | |||||
| PROCESSING_PARAMETERS | |||||
| ValidateDocument | Validate document against schema | DOCUMENT_ORIGINAL_FULL_PATH | DTS_DOCUMENT | ||
| PROC_FUNC_CALLCONTENT (R) | |||||
| *the ? sign means that action will try to read the left-side value and if it's not present, will use the right-side value | |||||
| (R) | indicate that the variable is required | ||||
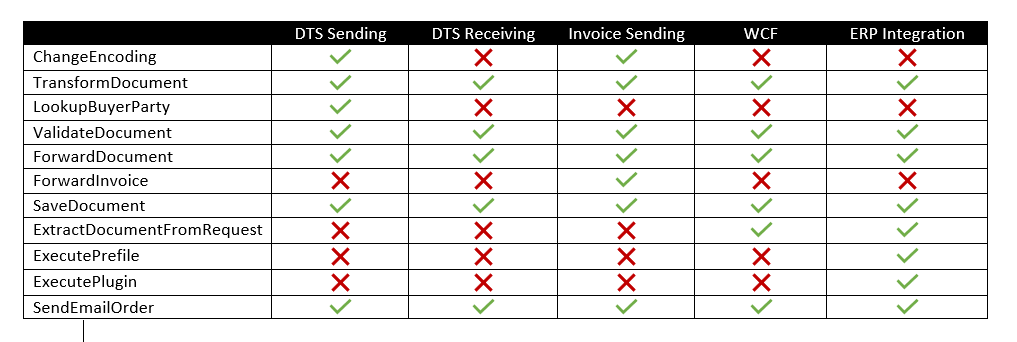
All the actions does not work in all the environment where you used the workflows. In the following table appears for each action in which functionality is possible to use:
| Parameter | Description |
| DOCUMENT_ORIGINAL_FULL_PATH | This is a path at which document is detected by DTS e.g. c:\dts\outbound\invoice |
| DOCUMENT_PROCESS_FULL_PATH | This is a path to which document is copied after it is detected by DTS e.g. c:\dts\outbound\invoice\process |
| DTS_DIR | This contains dts information (tecId, authentication, pull schedule and paths) and is based on DOCUMENT_ORIGINAL_FULL_PATH |
| DTS_DOCUMENT | Parameter which contains the document after it's validated, used in ForwardDocument when processing from dts and not web service |
| FUNC_CALLID | Parameter which contains the function call ID as it was passed to the workflow. It's value does not change |
| FUNC_CALLREQUEST | Parameter which contains the request as it was passed to the workflow. It's value does not change |
| FUNC_CALLRESPONSE | Parameter which contains the response as it was passed to the workflow. It's value does not change |
| PROC_FUNC_CALL_TRANS_ID | Parameter which maintains the function call transaction ID as it is being "processed" during the workflow execution |
| PROC_FUNC_CALLCONTENT | Parameter which maintains the function call content as it is being "processed" during the workflow execution |
| PROC_FUNC_CALLREQUEST | Parameter which maintains the function call request as it is being "processed" during the workflow execution |
| PROC_FUNC_CALLRESPONSE | Parameter which maintains the function call response as it is being "processed" during the workflow execution |
| PROC_FUNC_CALLTYPE | Parameter which maintains the function call type as it is being "processed" during the workflow execution |
| RESPONSE_VALIDATION | Parameter which contains boolean value determining validation in execute prefile and plugin |
| SUBJECT_DEFAULT | Parameter which provides default email subject: "New Order Received" if it's not provided as action parameter |
| TEC_ID | Parameter which contains dts tecId |