¶ Maintenance Windows for supplier
The Maintenance Windows tab allows you to create, review, edit, and delete maintenance windows for your organization.
A Maintenance Window is a time period during which your organization’s order system is not available, for example due to technical maintenance or planned system updates.
During an active maintenance window, buyers who try to send messages or orders to your organization receive a predefined maintenance message. Orders placed during this period are not queued and will fail with the configured message.
Maintenance messages can be provided in different languages.
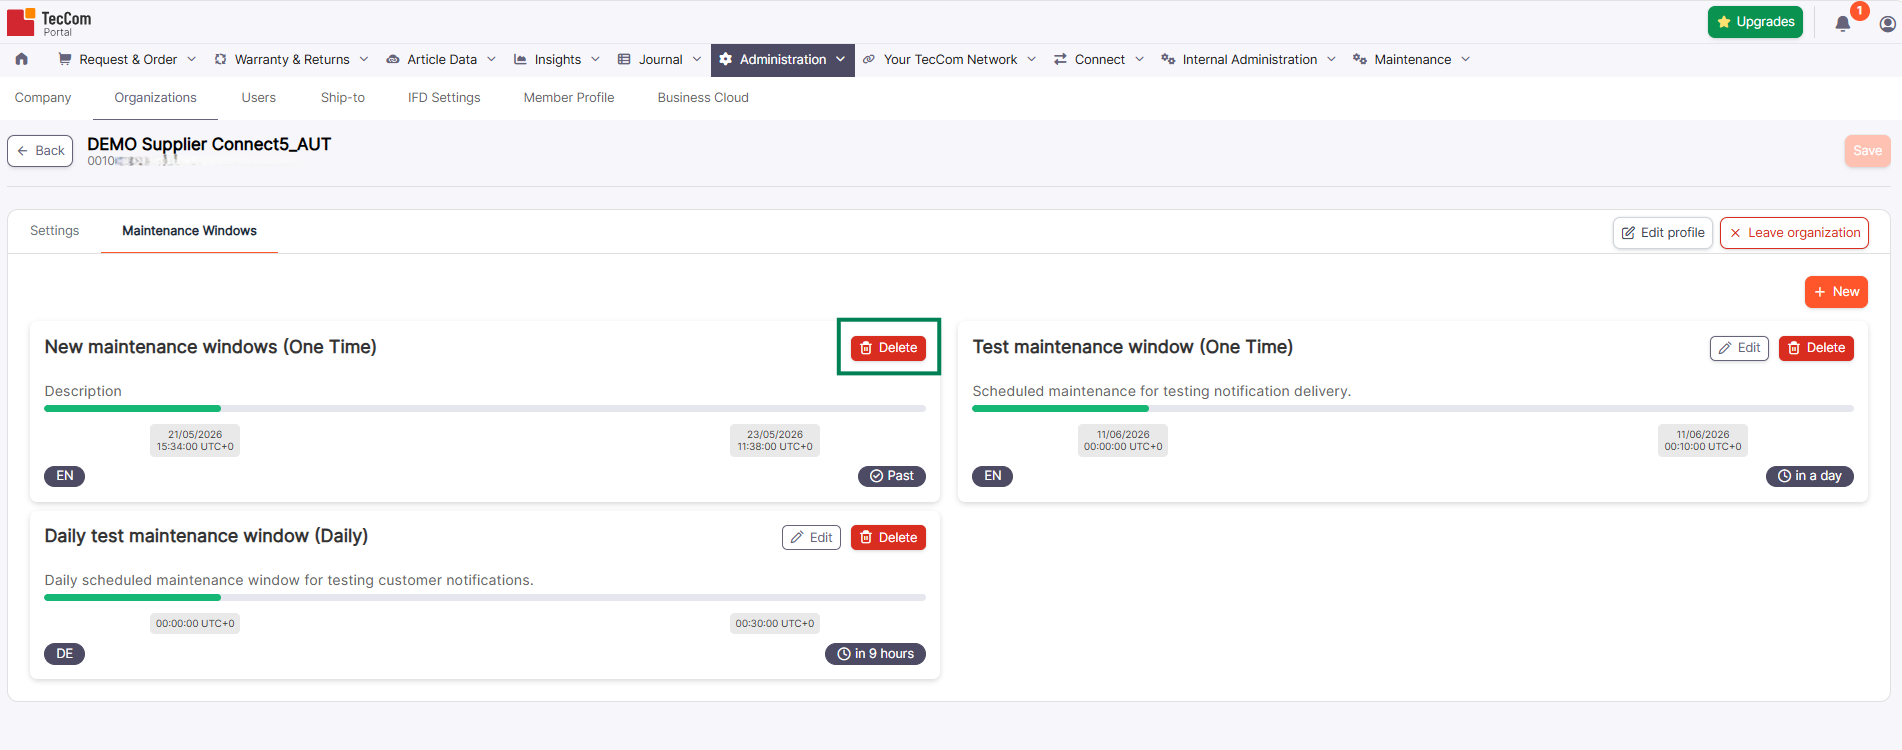
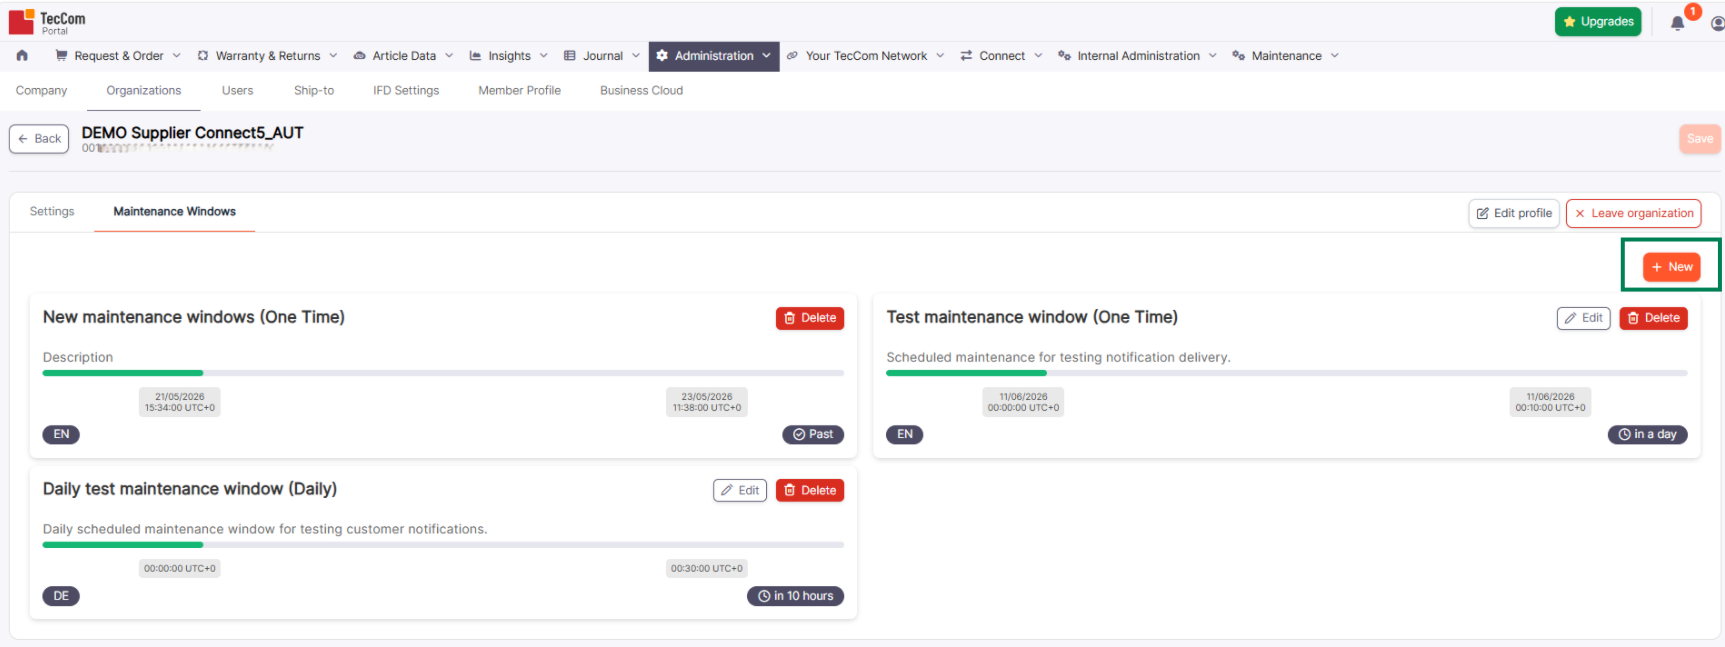
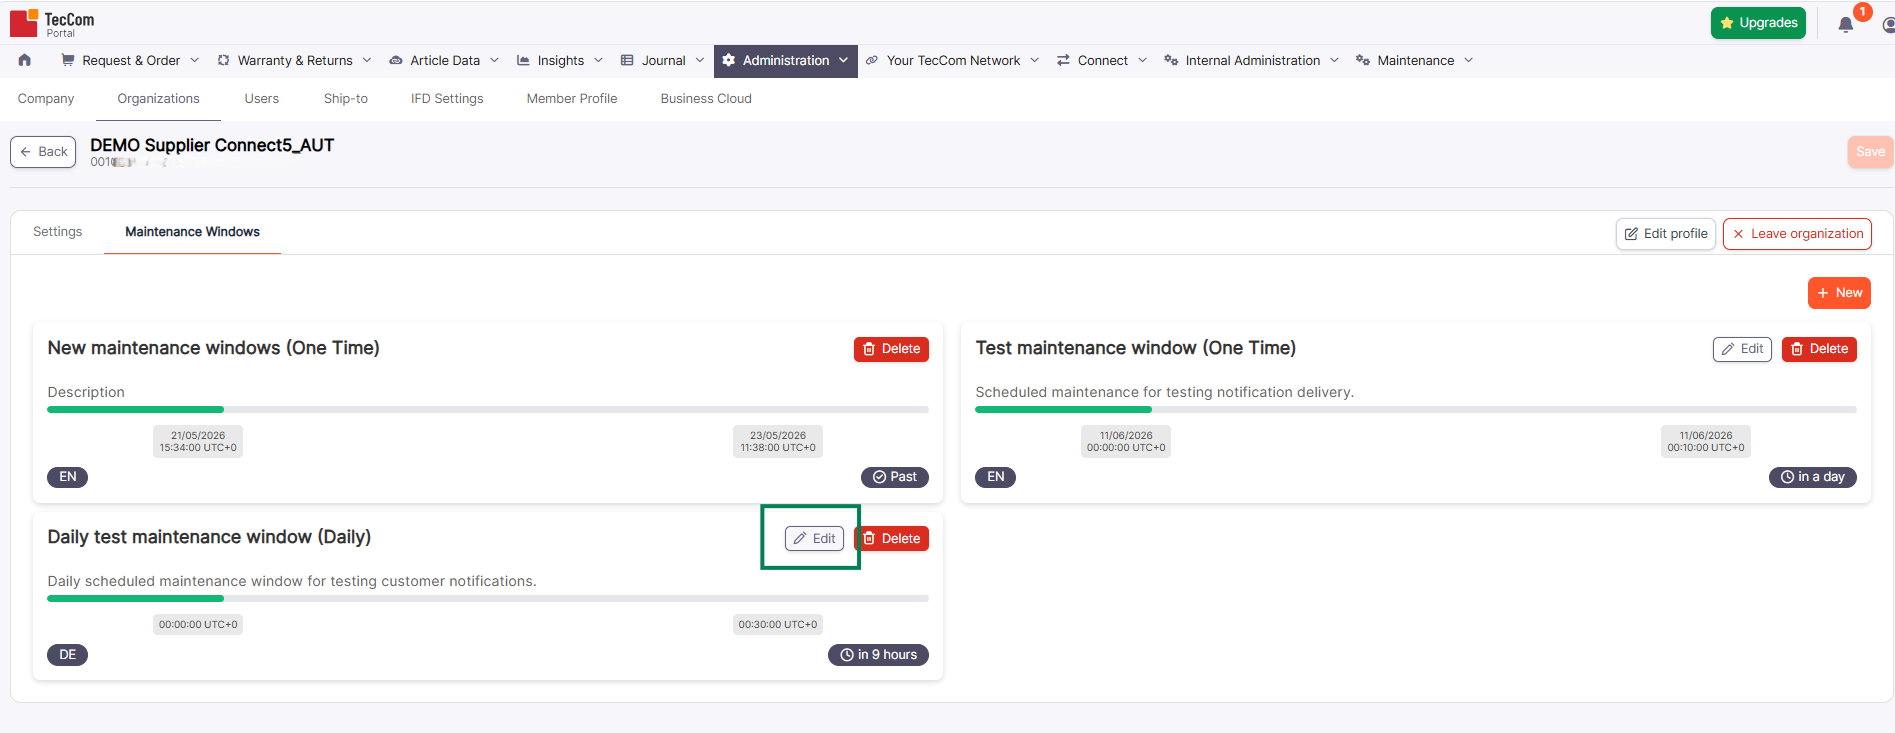
¶ List of Maintenance Windows
The Maintenance Windows tab shows all your created Maintenance Windows. You can create up to a maximum of 6 Maintenance Windows. The badges on the bottom indicate in which languages the messages are available for this service window.
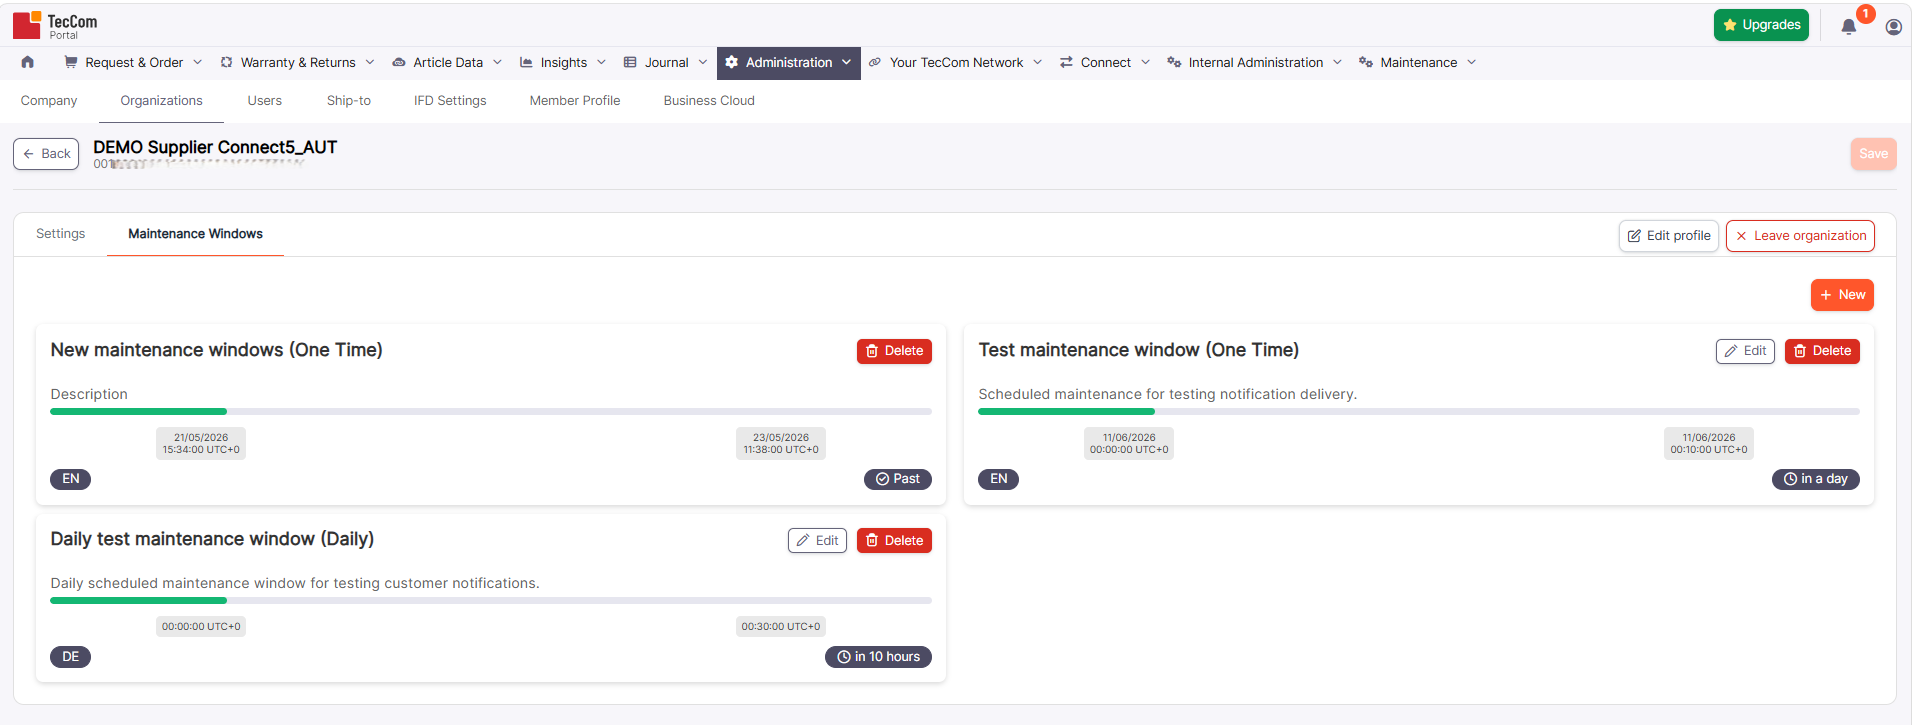
The time of the Maintenance Window is shown in UTC (Univeral Time Coordinated). The create and edit dialogs also show the corresponding local time for reference.
Maintenance Window cards may also show a status badge, for example Past or In X days, depending on whether the maintenance window has already ended or when the next occurrence starts.
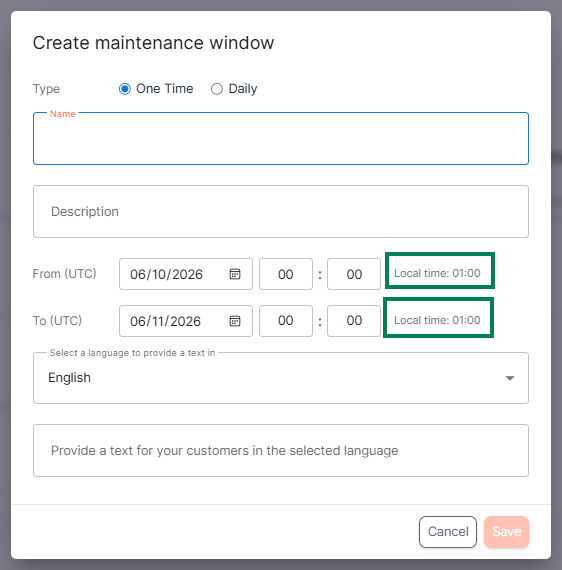
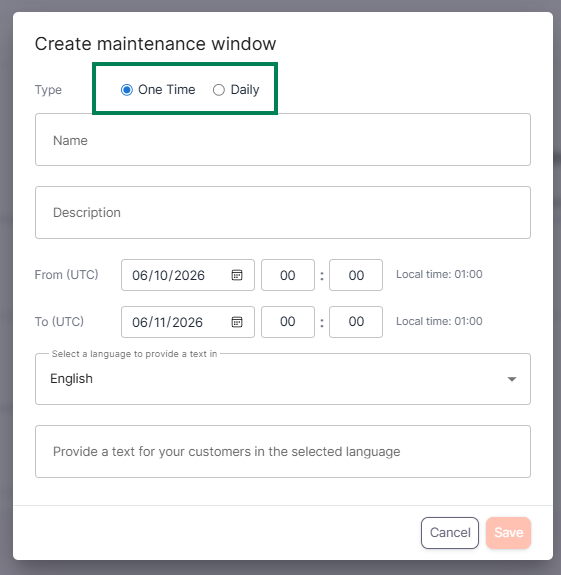
¶ Create a Maintenance Window
Click New to create a new Maintenance Window.
In the dialog, you can choose between a one-time Maintenance Window or a daily recurring Maintenance Window. Additionally, you must enter a name and a description for the Maintenance Window.
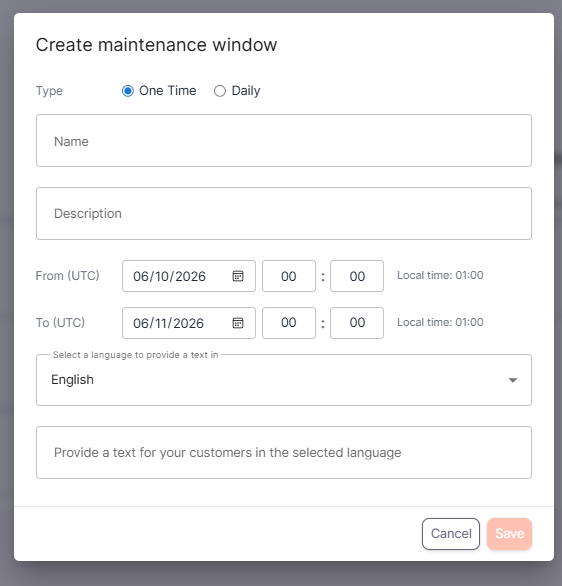
¶ One Time Maintenance Window
If you choose One Time, select the From (UTC) and To (UTC) date and time for the maintenance window.
Please remember that the selected time is in UTC. The dialog also shows the corresponding local time for reference.
Click Save when you are done to create the Maintenance Window.
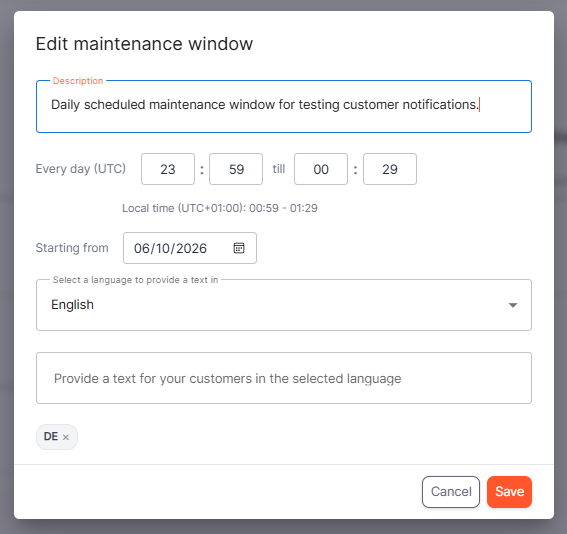
¶ Daily Maintenance Window
If you choose Daily, enter the Name and Description of the Maintenance Window.
Then define the daily maintenance period in the Every day (UTC) field by selecting the start and end time.
Select the Starting from date to define when the daily Maintenance Window should become active.
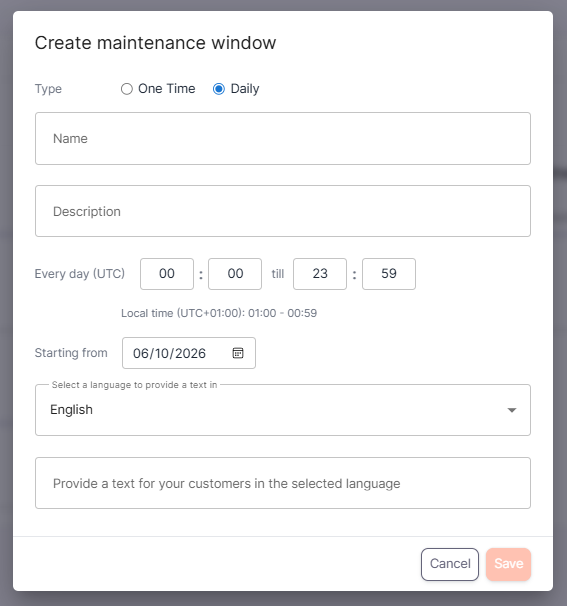
Please remember that the selected time is in UTC. The dialog also shows the corresponding local time for reference.
Select a language and provide the message that should be shown to customers during the Maintenance Window.
Click Save when you are done.
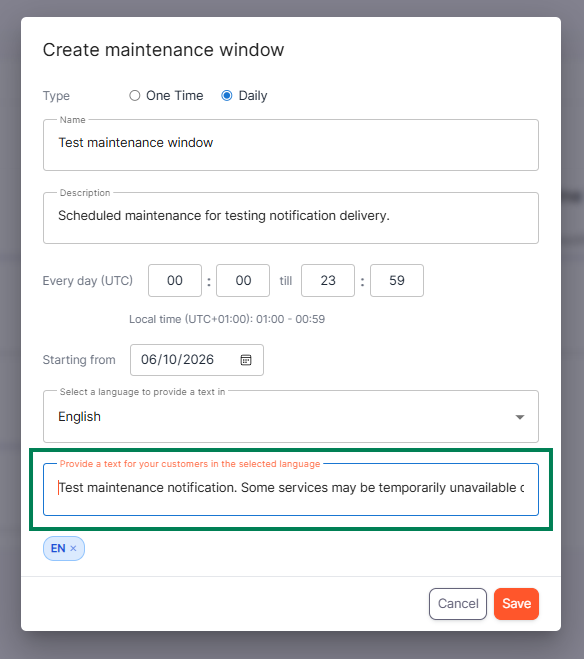
¶ Adding messages in different languages
The maintenance message can be provided in the selected language. Choose the required language from the dropdown and enter the message text below.
Currently, the following languages are available for the maintenance message:
| Language | Local Name |
|---|---|
| Bulgarian | български |
| Czech | Čeština |
| German | Deutsch |
| Greek | Ελληνική |
| English | English |
| Spanish | Español |
| French | Français |
| Hungarian | Magyar |
| Italian | Italiano |
| Dutch | Nederlands |
| Norwegian | Norsk |
| Polish | Polski |
| Portuguese | Português |
| Portuguese (Brazil) | Português (Brasil) |
| Romanian | Română |
| Russian | Русский |
| Swedish | Svenska |
| Turkish | Türkçe |
| Chinese | 汉语 |
| Japanese | 日本語 |
| Korean | 한국어 |
| Thai | ไทย |
| Vietnamese | Tiếng Việt |
¶ Edit a Maintenance Window
To edit a Maintenance Window, click Edit on the Maintenance Window card.
The Maintenance Window dialog opens and you can adjust the description, time settings, and messages. The name of a Maintenance Window can't be changed after it has been created. Click Save to save your changes.
¶ Delete Maintenance Windows
To delete a Maintenance Window, click Delete on the Maintenance Window card.
In the confirm dialog, click Yes to permanently delete the Maintenance Window, or No to cancel the action.